


| July 20, 2007—The barn gets puffy | |
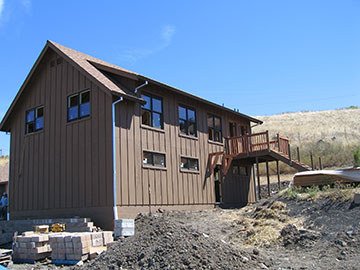 |
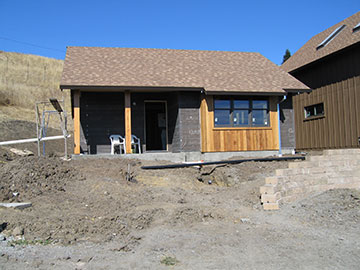
When I got to the site this morning, a lot had been done since Wednesday. Kai had finished the deck railings and was working on the stair railings; and his helper had made a good start on the retaining wall in front of the barn. We are kind of making the retaining wall up as we go along. At the start of construction, we changed the location of the barn door from the original drawings and moved it closer to the front of the barn so we could drive a truck up to the door without hitting the guest cottage—as we would have in the original concept. At any rate, in order to get a driveway up to the door and rather than have a hill in front of the barn and lose all that potential parking, we are putting in the retaining wall. |
 |
Here you can see how it extends out in front of the guest cottage. It’s hard to tell in this picture, but it curves down toward the main driveway so you will drive up and turn to the right to unload at the barn. We will cover all the dirt with driveway base-rock and all of that will be covered with gold DG (decomposed granite). |
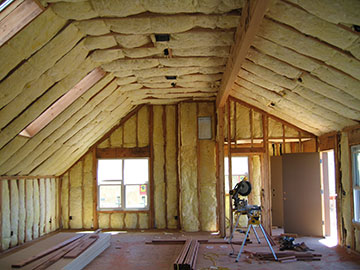 |
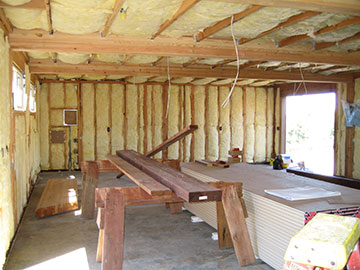
Walking up the stairs into the barn—which was so incredibly cool to finally do—I saw that the insulation was all installed. Now the interior of the barn has a quilted look. Notice at the east end, by the bathroom, the casing for the main duct and air return is now insulated and you can hardly tell it is there. Once the sheet rock is installed, you will only be able to see the air return vent. With the insulation in, you get a better picture of what the finished ceiling will be like. I love the feel of the space. It looks nice in the picture, but there are almost a 1,000 square feet of space in this room, and it has that open, generous feel of a loft. I love the high ceilings, but I also love the coziness of steep roof pitch on the north wall. |
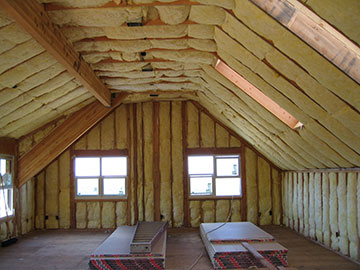 |
Facing west toward my office area, the insulation is starting to give the space a more finished look. Kai has been busy sanding off the edges of all the exposed wood on the beams on this floor and below. Once the painters arrive, we will have to sand off the muddy footprints from the high beam and Sugar-the-dog’s prints from the shed roof beam. (For those of you tuning in late, see the framing pages from May for more info on those details.) |
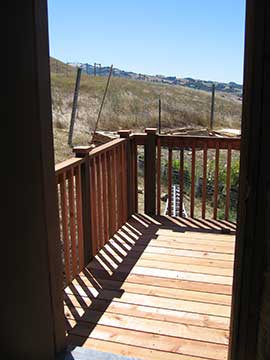 |
Kai has also worked on the deck rails. Raw redwood has got to be the prettiest sight. Too bad no one can figure out how to keep it pink. It darkens up and grays out pretty quickly in the sun, but I will get to enjoy it for a little while. |
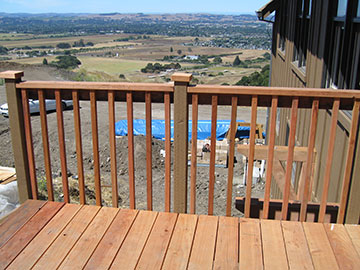 |
This picture shows off the color better. It really looks great with the stain color—better than the photo. Kai, in true finish carpenter style, has put some extra little touches in with the nice beveled edge caps. |
 |
The downstairs of the barn has gotten the same quilting of insulation as the upstairs and is all ready for sheet rock. If you look down toward the far end, you will see the electrical circuit box (carefully covered with cardboard by the insulation installers) and below that a phone/cable box. This building will have land-line phones and a satellite dish for internet service, since there is no DSL line or cable coming up our hill. I still have to determine what vendor I am going to use for dish service, but I will need it for sure in my office. |
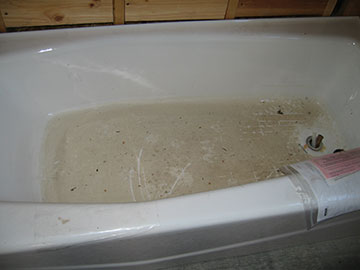 |
They finally got the water out of the bathtub, but of course it is still filthy. Ick! I stood in it after I took this picture to see if it would be ok to take a shower in. It’s small, but I think, do-able. I am definitely getting a curved shower rod however. I hate it when you are in a hotel with a small tub and the disgusting shower curtain sticks to you because the space is too small. I also picked up the trim pieces for the tile today. When I looked at the bundle of quarter-round, I realized that I had ordered far too few. When I went back to order more, I saw that in my notes, I had left off 3/4 of the trim because originally I was going to get bullnose and quarter-round and instead wound up getting all quarter-round. They promise me the color lots will match. |
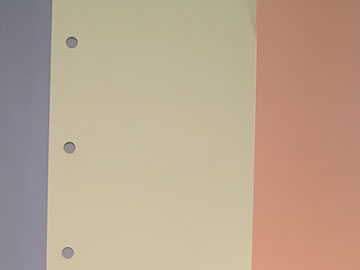 |
These are the colors that we will paint the interior of the guest cottage. My color guru—Gerald Reis of Gerald Reis Design—picked out the palette for us. It looks awful here next to the split-pea green background of the site, but I think it will look great in the cottage. The colors will look different on each computer, so I will just say that the yellow is a sandy yellow and the terra cotta is a light flowerpot color. The lavender comes across as a neutral—slightly grayish—in the guest cottage. The bathroom tile will be white with quarter-round trim almost exactly the same as the yellow in this picture. |
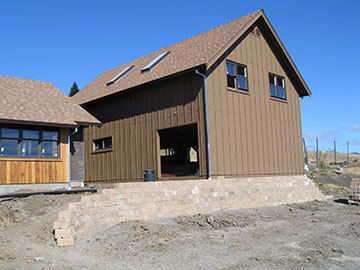 |
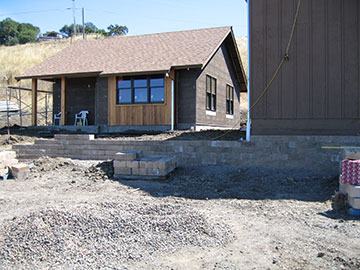
By the end of the day, the wall in front of the barn was finished except for the cap row. Here you can get a better idea of how it will curve up from the main drive to form a ramp into the barn. I still haven’t decided whether to stain it with diluted barn stain or not. I can wait until the cottage is stuccoed—something that should happen soon—and see how everything looks together. At present, the wall, although slightly pinkish, blends in pretty well with the dirt. |
 |
Here is a straight-on view of the guest cottage with the curving wall. There will be a place for people to park on the slope up to the guest cottage. I will probably plant mostly in wine-barrel tubs in front of the cottage, at least at first until I get a feel for things. For fire safety, it is very important in this area to have a good fire-break (the driveway) and keep a circle of “lean and green” around a dwelling. This dry year, with all the fires we have had so early in the season, certainly keeps fire safety in the front of our minds. I want to plant a few oaks uphill from the cottage and we are required by the county to plant a few in the gully on the other side of the driveway, but they are fire resistant, and as long as we keep the weeds down, we should be ok. |
| back to top | |