


| July 6, 2007 —Ducting installed | |
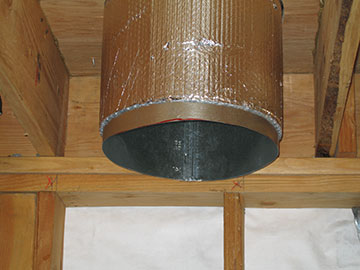 |
When I got to the property today, the HVAC crew was there installing ducting in both the barn and guest cottage. I was so impressed with the work that they had done—everything was so neat and exact. This is the heat duct in the barn, coming through from the second floor to where it will connect with the furnace on the first floor. |
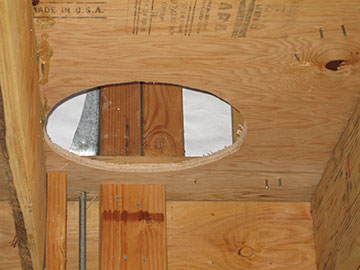 |
This hole in the floor ceiling of the first floor will be where the air return for the furnace comes through from the second floor. |
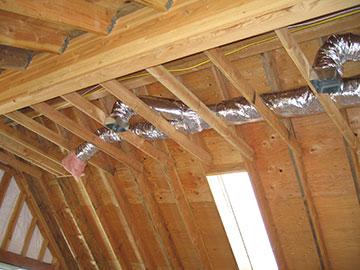 |
Upstairs, the ducting for heat and air conditioning has been threaded through the rafters at the peak of the barn roof. Once the insulation is installed, the ducts will be covered over with drywall, although I actually think they look very cool. |
 |
Looking east in the barn, you can see where they join into the vertical duct up from the furnace. |
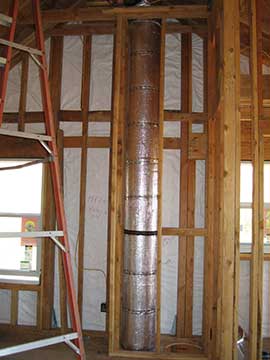 |
Here is a better picture of the duct from the first floor. It will be enclosed with little walls (called a chase) along with the air return duct, which has yet to be installed. The chase will take a little chunk out of the back wall of the barn, which I regret, but I couldn’t figure out another place where I would like it better. Basically, despite the huge size of the second floor of the barn, I am very miserly of the space. I also got word from the contractor today regarding flooring for the 2nd floor of the barn. Originally, we were not planning a finished floor at all, however now that I will be using it for my office, I want something more than raw plywood on the floor. Janver says that he can now get non-formaldehyde chipboard at a decent price, so we will staple that down and coat it with some heavy clear finish. |
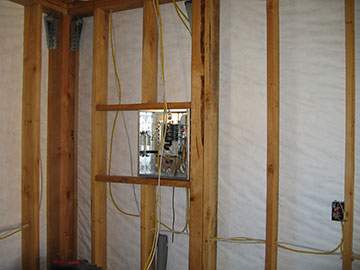 |
Back on the ground floor of the barn, the electric service panel has been installed. |
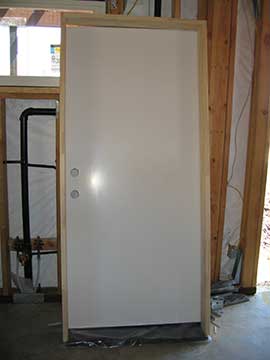 |
Also, the exterior doors have arrived. Here is what they will look like—although they will be painted brown to match the barn. They are fiberglass doors, which are very sturdy and weather resistant; also they do not get hot in the sun as steel doors would have done. Kai was busy hanging the doors today and got all of them done except this one, which is the downstairs back door. Sadly, we have had to go with a regular garage door instead of a corrugated steel door for the big barn door. The reason for that is rodent proofing. You can seal up a garage door much better than you can seal a corrugated door. Plus, because the garage door is insulated, we could run the heat or AC on the ground floor if we need to. |
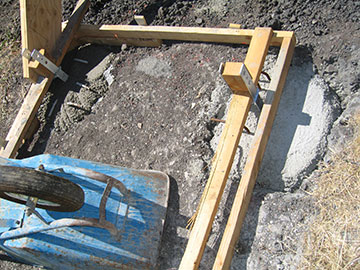 |
Sorry for the unnerving angle of this photo, but it was hard to find a good one. This shows the footing for the slab at the bottom of the barn staircase. |
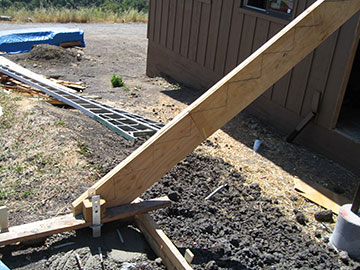 |
Here is one side of the stairs, temporarily attached to a stake. Drawn on it, you can see where each stair will attach. There has been some concern whether the pressure-treated wood used on the deck posts would take the stain properly, however, the test pieces look fine. Basically, the stain is so opaque it is virtually the same as paint. |
 |
Here is a better view of the deck platform and the new doors—both blocked open so they don’t blow around until the doorknobs come. |
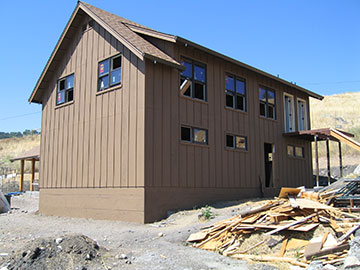 |
As you can see here the barn stain is complete—except for the doors, deck and stairs, of course. We have decided to go ahead with the retaining wall using the blocks we already have and staining them with diluted stain. The retaining wall will start in front of the guest cottage curving up to run parallel along the front of the barn, then curving around to die into the barn just under the little window on the side of the barn toward you. The dirt on the side of the barn will be built up and leveled out, with a few stairs down to the driveway level. |
| Click here to see more pictures from July 6th | |
| back to top | |