
| March 19, 2008—Many parts arrive at the site | ||
 |
It was very foggy when I arrived at the site today and cold—but not the frigid cold of January. The ghost tree was back, looming in the morning fog. A lot of items had arrived since the previous Friday, and the wiring and prep for plastering were moving briskly along. |
|
 |
Kai had installed the bottom panel with the
switches in the range hood. I tried to simulate standing in front
of a hot stove and reaching for the fan switch. The floor in the
kitchen is suppressed (lowered) 3/4" to
accommodate the cork flooring, so I had to
stand on a piece of plywood to approximate the actual final floor
level. Also, the stove will stick out from the wall and you don’t
want to “belly
up” to
the stove when you have a hot pan on it, so I had to allow for that
too.
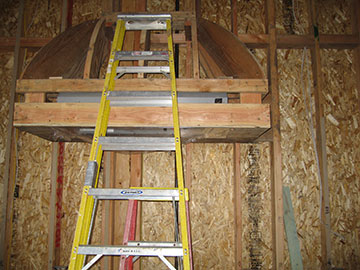
At any rate, we decided that the hood is too high and needs to be lowered. This is a problem, because not only is the framework firmly attached to the wall, but the curve to the corner has a relationship with the cabinets and cannot be moved up or down without changing the cabinets too. |
|
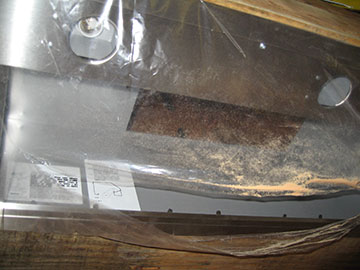 |
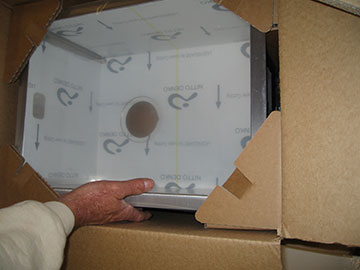
This very bad photo is the bottom panel of the range hood covered in plastic. You can see the lights and the hole where the ducting will attach. The blower is on the roof so it won’t make a lot of racket when it’s on. Kai and I decided that he could add another 2 x 4 to the bottom of the range hood, which would lower it 3 1/2". That would still be a stretch for me, but do-able and would not change the appearance of the range hood too much nor disrupt the relationship with the cabinetry. |
|
 |
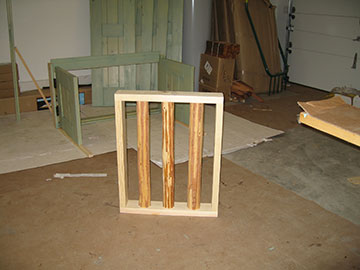
Our saloon doors arrived from New Mexico and they are so cute! They will be installed at one end of the foyer, between the guest bathroom door and the guest bedroom and library doors. (See the Floorplan if this is too confusing.) I wanted a visual barrier to demarcate the very public area of foyer from the more private area of the guest room/library wing. I had seen saloon doors in some of the source books I looked at and just couldn’t resist them. They will be on double swing hinges and will probably be kept open most of the time. |
|
 |
Here is one half of the gate to the courtyard, which also arrived. It will have clavos (ornamental iron nails with large heads) installed on it for decoration. I am having angst about the clavos because I don’t know whether to get ones that rust and coat them, the cast iron ones—which are too regular looking, or the very expensive, forged ones. We want to put them on the front door as well, so perhaps I should contact Michelle at Mad Mule Door, the company which made the front door, and ask her what she uses. |
|
 |
Here is the latilla grille which will go in the window-shaped hole in the courtyard wall. The latillas are not as peeled as the rest of them, but I don’t care, it looks so cool. Plus, sand paper will solve that problem if need be. | |
 |
Here is our prep-sink which we snagged from the UPS guy late Friday afternoon. It measures 15" x 20" and there is some concern on the part of the cabinet makers that the dimension will be too deep for the plumbers to comfortably install the faucets between the sink and the wall, since the counters are only 24" wide. We will need to discuss this with the counter fabricators as well, but the obvious solution is to mount the sink sideways. Although the drain is set to the "back" of the sink, I don’t think it will be a problem if the drain is on the right and it may be more useful in that orientation. My only regret is that we would lose 5" of precious counter space, but, oh well. |
|
 |
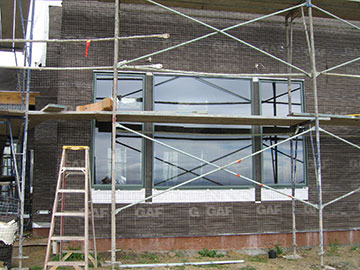
When I went through the house this morning, one of the framing crew was carrying brackets outside and setting them up for installation over the windows. These brackets will be installed prior to plastering. Those of you regulars will remember that they needed to be routed out along the back edge to accommodate the plaster. I believe that they will also get boot flashing on top before the plaster goes on. |
|
 |
While taking pix of the brackets sitting on the scaffold, I noticed something I knew about but hadn’t photographed before, the wiring for the storm shades. | |
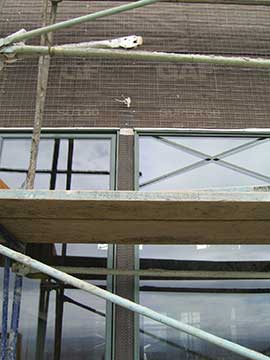 |
Notice that little white wad of stuff above the division between the two windows? That is the wire for the storm shades. Each window will have an individual shade which is electrically operated from inside the house. We had originally wanted to install these shades to cut off the sun in the west and southwest facing rooms for summer climate control, but I think they will be excellent protection for the windows in stormy weather as well. I am a little worried about our windows because they are not rated for very strong winds—which we often get in our location. We are flashing them within an inch of their lives and have added as much weatherproofing as we can, but if a storm gets too bad, it sure will be good to just shut the shades. I just wish we had them on the south-facing clerestories as well. |
|
| Click here for more from March 19th | ||
| Check out today’s garden pictures—click here | Back to top | |