


| October 5, 2007—The slab dries in the sun . . . | ||
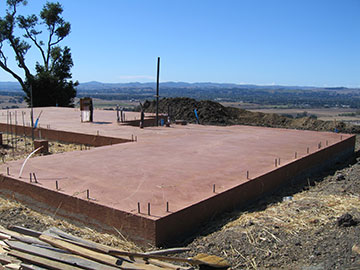 |
It was sunny Thursday and Friday and they had spread straw on the slab to keep it from curing too fast. When I arrived, Thomas, the framing crew chief, was there. He had removed the straw so he could make sure that the walls were square and then start laying out the sill plate. Thomas was in charge of the framing on the cottage which was very well framed. Good framing contributes to a good wall finish from the drywallers, because—of course—if the walls are all true and square, the sheet rock goes up without a hitch. We really wanted Thomas to be our framing chief so I was happy to see him on the job. |
|
 |
I did some writing on the slab while it was wet, which will disappear under the sill plate. It is hard to see in this photo but our names are printed in the concrete at the corner. |
|
 |
Here is a shot from the same view—through the guest bedroom closet to the living and dining rooms—that I took before the pour and again the concrete wet. In this light you can see the buff marks from the final troweling, but if you look directly at the slab, they don’t really show. | |
 |
This is looking from the master bedroom toward the kitchen. You can see the delineation of the master bedroom walls by the sheer-wall bolts sticking out of the concrete in the foreground. | |
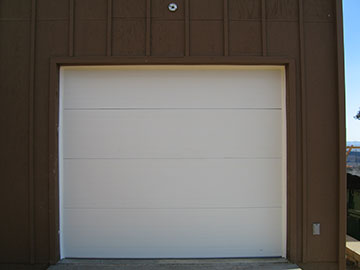 |
One thing that has been a problem is the garage door on the barn. I had wanted to have a corrugated steel door, but they don’t seal very well. Since rodents are a big problem at the site, I wanted a door that sealed up when it was closed to keep mice out. (Our cross-the-street neighbor told me he lost once lost 3/4 of some storage to mouse depredations.) Janver—at my request—ordered a smooth garage door. When it came, it was textured in a hideous, fake wood texture (see close-up below). When he called the company, it turns out that they do not make a truly smooth door, the rep just thought Janver meant no raised panels.
|
|
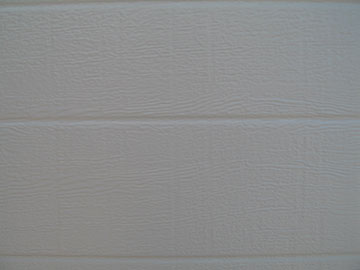 |
You can see that the phony wood look is pretty disgusting even in this low resolution photo. Evidently, the texture strengthens the vinyl surface and keeps it from expanding in the sun, so they do not make completely smooth ones. Why they cannot make one with an attractive industrial-style texture, I do not know. But we will probably be stuck with this door. Bummer. Hopefully, once it is painted, it won’t look so bad. |
|
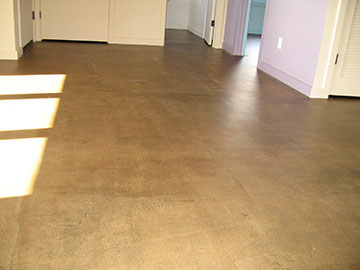 |
The floor in the cottage has been refinished with pretty good results. This shot is a little deceptive, because the camera flash lightens everything up. The floor is really a much darker brown, and I like it a lot. It really works well with the colors. The painter will work over a few little spots and then put some kind of finish on it and then it will be done. |
|
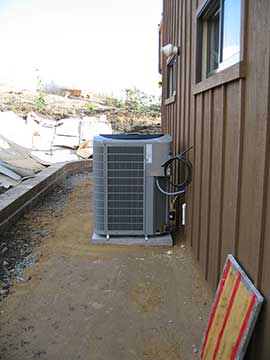 |
We also got the HVAC unit all hooked up in the barn. Earlier this year, after much angst, I decided to take the AC off the cottage construction and add it to the barn. My rational was that the cottage—as well insulated as it is—would stay comfortable, even on a hot day. The barn, although it is insulated, is not as well insulated as the cottage; plus, the second floor, where my office will be, will catch all the rising heat of the structure. In reality, neither of these structures has ever been uncomfortable from the heat, but we did not really have much hot weather this summer, so we will have to wait and see whether this was a good idea or a waste of money. Whatever, the unit is huge. It sits on its own little pad, which the HVAC guys brought with them and installed. I was amazed at how big the thing is, but the HVAC guy told me that it was a very efficient unit and would work very well. |
|
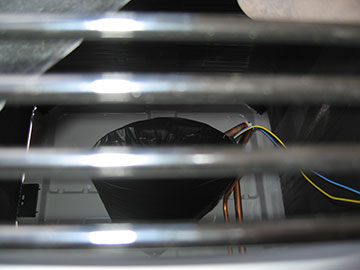 |
When Kai got the the job, I showed him the HVAC unit and mentioned how big it was. He said that I should come and look in the grating at the top. To my surprise, when I looked inside, there was hardly anything there—just a little piece of machinery, covered by a plastic cover—the rest of that big metal thing just holds air! Weird. |
|
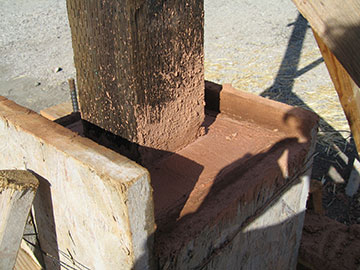 |
Here is the top of one of the carport piers. How glad I am that they are red instead of gray! | |
| Back to Top | ||