
| Garden Archives—Click here to see archived garden pages |
| Rose Garden Plan—Click here to see the rose garden design |
| The Garden—June 2008 | |
| June 25 & 27, 2008 | |
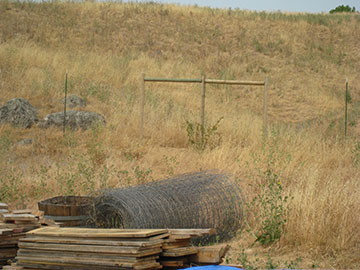 |
This junky photo is actually a photograph of the Cecile Brunner rose against the fence. It is getting irrigation and is doing fine—although I am concerned about it during heat-waves. By next year, it will be up to the top and in several will have engulfed the fence. |
 |
In another testimony to the toughness of roses, notice the little Sally Holmes growing out of that hard clay. We had a tub here with a Sally Holmes in it. When we transplanted the rose in the tub, we found it had grown roots through the hole in the bottom. The roots have survived and produced a new plant. |
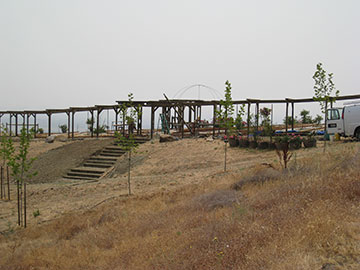 |
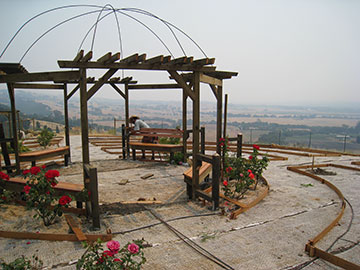
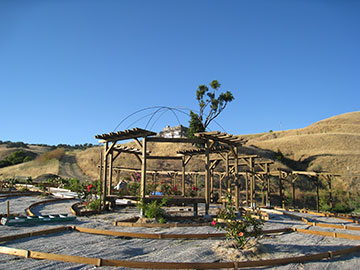
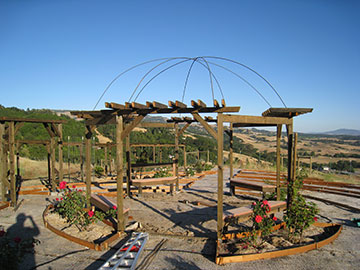
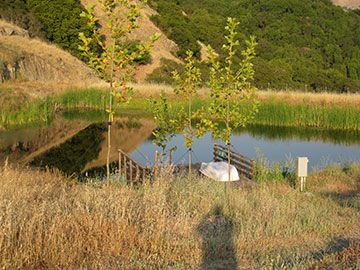
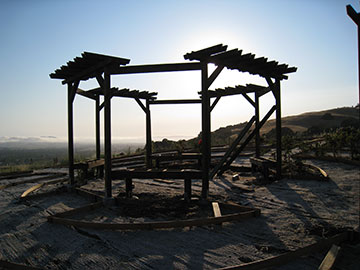
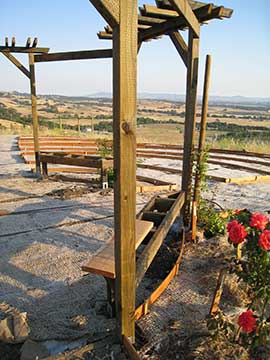
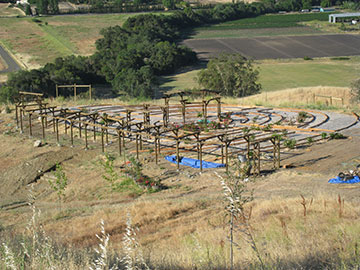
My assistant had gotten the path around the pond weed-whacked so I took a walk out to look up the gully. I am concerned about fire going up the gully and wanted to see what the weed situation was from below. I took this photo of the almost completed arbor from across the pond. Boy, does it look great. |
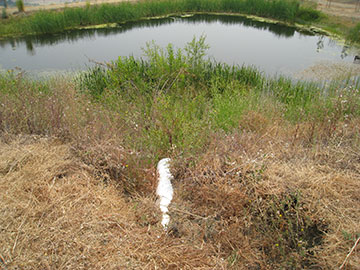 |
This is the downspout from the gully silt basin. We had a huge blow-out of the silt basin in 2006 and as you can see, all the dirt and rocks went into the pond forming this little peninsula. Sometime in the future, we will need to get that dug out, but in the meantime, we need to fix the silt basin. |
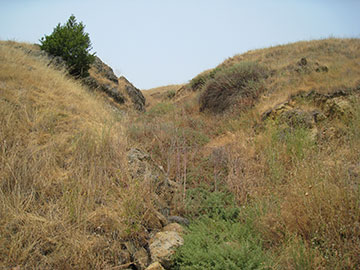 |
Looking up the hill toward the house, here is the gully. You can’t see any of the house because it is hidden by the shoulder of the hill. |
 |
Those green shrubs are native wild fuchsia and quite cool looking when they bloom. These will probably be washed out next winter, but there are a lot more up the bank. My plan for rebuilding the silt basin is to enlarge it to its former proportion and instead of damming the top with rocks, use gabbions made of chain-link fencing filled with 4"-8" rocks. When the water over-flows the edge of the silt basin, these will sieve out the silt but let the water flow through. If we anchor them properly, they could work. I saw this done in Canyon DeChelly in Arizona and think we could use the same technique here. |
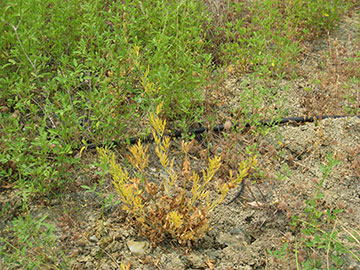 |
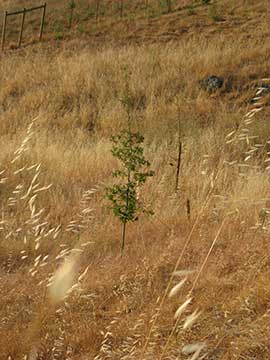
Our little matilija poppy is not doing so well. These plants are quite drought tolerant, so either it did not get established properly or perhaps (hopefully) has gone dormant. |
 |
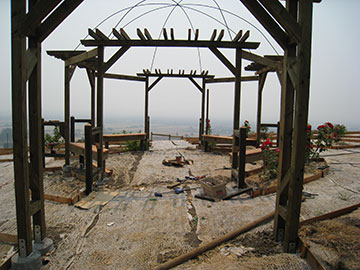
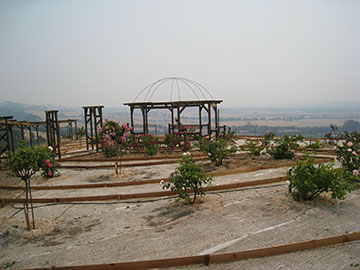
The arbor and gazebo look wonderful even in the smoke. This was one of the days with smoky air. |
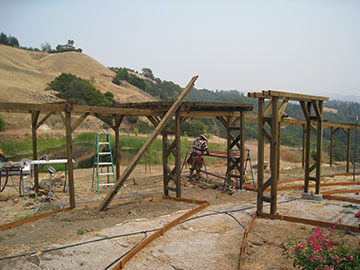 |
Here is Joseph, the carpenter, putting the cross-pieces on the middle section of the arbor. I give him full credit for working with me to make this a showpiece. Once it is covered with roses, it will be amazing. |
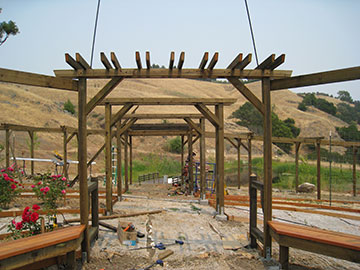 |
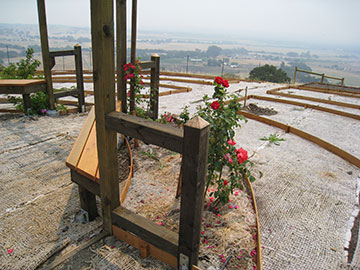
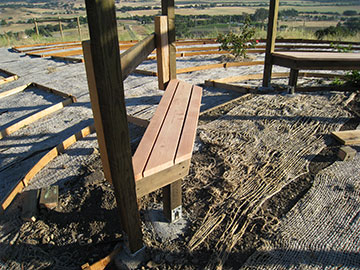
Looking from the gazebo back toward the middle section of the arbor and the pond, you get a good view of the additions to the gazebo. We have the benches on all four sides and also, little “gates” at each entrance. The actual purpose of the short little fences extending out on either side of each entrance is to stabilize the structure, which was a little shaky before these braces were installed. Joseph and I also thought they would keep the roses from encroaching into the paths. |
 |
The result is actually welcoming as you come toward the gazebo. |
 |
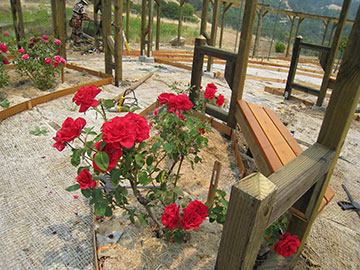
Here is a close-up of one of the braces. We had to be careful again because of the level change in the garden. Going from north to south, the tops of the braces keep the same level across the structure, so the north ones are actually shorter than the south ones. Going from east to west, the problem was different. When I laid out the garden, I made the path going into the gazebo from the arbor 8' wide and the path coming out to the west only 6'. This is because I thought I would have the arbor neck attached on the east but did not want to waste real estate for path on the west. If you look at the previous photo, you can see that this was not a problem, but and asset and makes the walk from the arbor even more pretty. |
 |
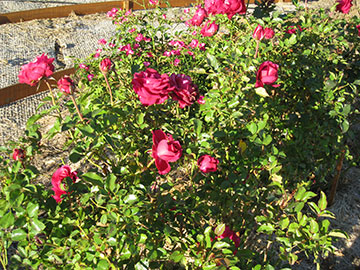
Here is the rose Royalty again, blooming like crazy. I was ready to pull out all the red roses earlier this year, but they love the heat. When everything else looks wilted, they are going strong. |
 |
We decided to put backs on the benches. Here Joseph is clamping on some wood so we can see how it looks. I decided to put backs only on the two eastern benches. That way the view won’t be obstructed from most points in the garden. |
 |
I am thinking about planting some other kind of vine besides a rose to cover the gazebo “roof.” So far, I have considered, bougainvillea, clematis, honeysuckle and more. I have plenty of time to decide because I won’t plant anything until it starts to rain. |
 |
The fires were so bad that the entire northern half of the state is covered with smoke. |
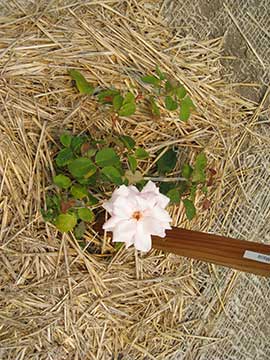 |
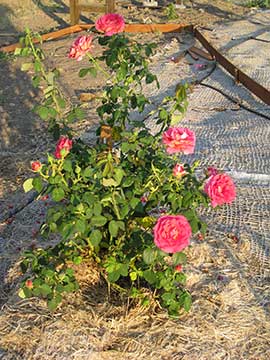
President Macia, the rose I bought at the Heritage Rose Conference, is doing well enough to put out another bloom. The straw around it acts as mulch and helps keep the ground wet. |
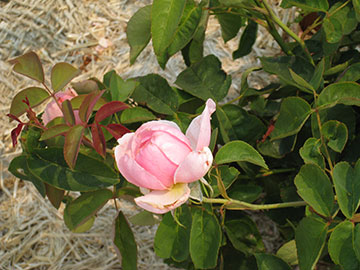 |
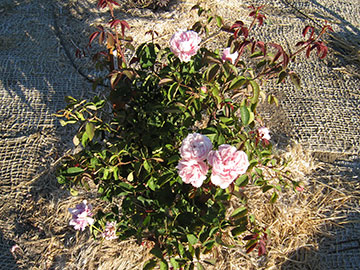
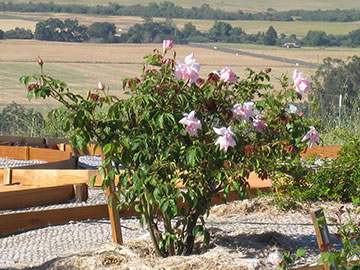
This is another, better photo of Bibi Mazoon, a David Austin rose, which is much happier here than in its old home. I fell in love with this rose from a catalogue and had felt quite cheated all these years. But now it is reaching its potential at last. |
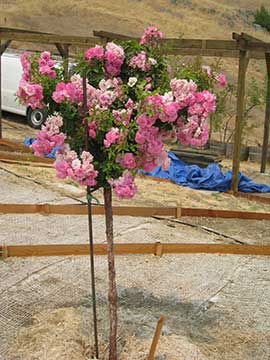 |
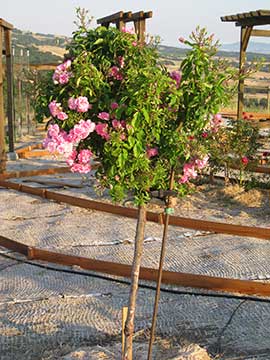
The China Doll standard has never looked so good either. I had hesitated about even bothering to move this rose, but am now very glad I did, since it looks so pretty. |
| June 18, 2008 | |
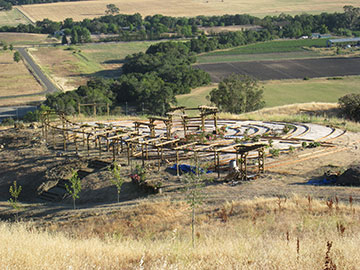 |
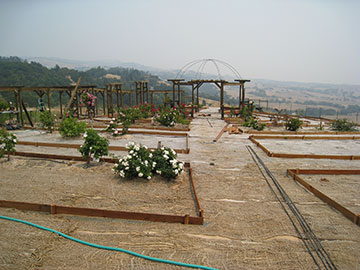
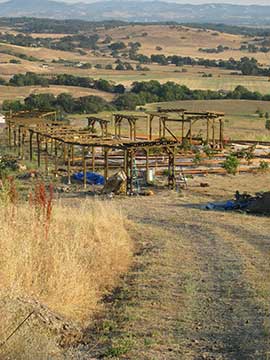
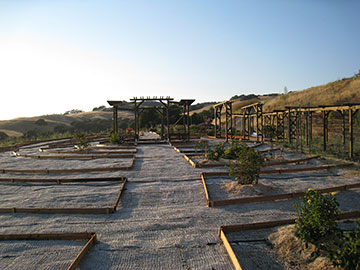
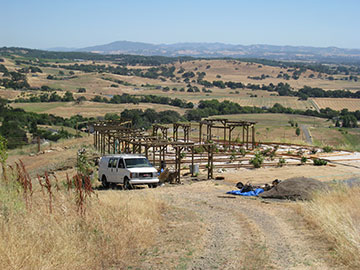
Today, when I arrived at the property, I had a few minutes to confer with Joseph and my assistant and then had to go off to meetings and was gone all day. At the end of the day, I just had time to say good-bye and then had to go off again. Finally, at about 7:30 pm, I got a chance to see what they had done today. Here is a picture of the progress from up above. My assistant and his assistant have been finishing up the bender board installation and Joseph put benches into the central circle. I took this picture then walked down the hill to take a closer look. |
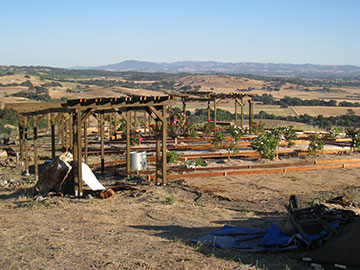 |
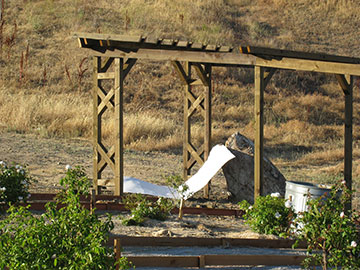
I wanted an good picture of the arbor entrance arch, but there is a lot of stuff lying around from the construction—including a big piece of white cardboard leaning up against the big rock next to the arch—but it did look wonderful. Then, I got a little closer and saw . . . |
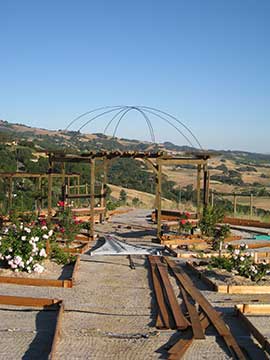 |
In Xanadu, did Kubla Khan, a stately pleasure dome did decree . . . They had put up the rebar dome! It was so wonderful that I just burst into tears! |
 |
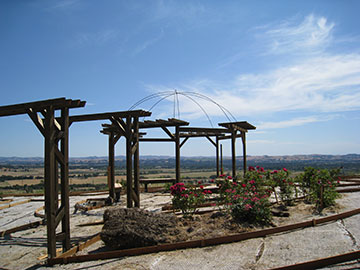
Here is a closer view where you can see the “dome” better. It actually looks kind of silly with the trellis tops of the arches but I just don’t care, I love it! |
 |
Joseph had gone to a local home center and picked out some very nice redwood for the bench seats. Then he planed the wood and sanded it smooth. They are quite comfortable. The board at the back is a mock-up for a real back support. We are not quite sure how we want to do the backs, plus, the whole structure needs some more bracing and we are still debating how to proceed on that as well. |
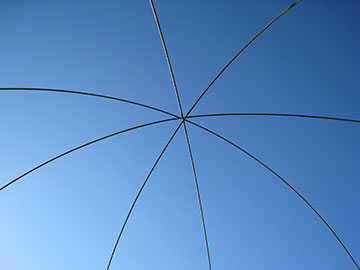 |
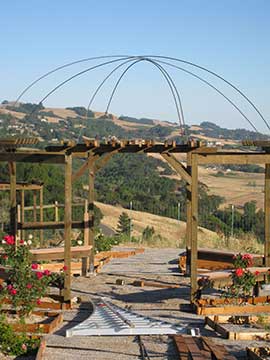
Here is the dome! Even though there is nothing to this roof, for some reason when sitting on a bench and looking up, it feels sheltering. |
 |
I took this picture from the southwest, framing the house in the dome. You can’t tell that well from this photo, but I now realize that I will need to orient the standards I plan to put in various beds to the sides of the structure with the seats. That way, they will have a relationship to the structure as well as the garden, radiating out in diagonal lines from the center. I hope I don’t end up having to move the ones I already put in. |
 |
Here the light is reflecting of the bench seats and you can see them better. We are now starting to call this the gazebo, instead of the central circle. |
 |
I will train something—either climbing roses or some other vine—perhaps clematis—on the rebar. Because we are sort of putting this together as we go, rather than having a well-drafted plan, I now see that the beds up against the gazebo are of inadequate size. I should have made them much thicker, but, oh well, too late now. I am just glad that I shifted the colors on the plans so that there was more room for red. If I had had any sense at all, I would have gone from red to white to yellow, with white in the center. There are a lot more vigorous light colored climbers for this big structure than red ones. |
 |
Here is the opening archway from the garden. Joseph had a big problem with the trellis cross-pieces because of the elevation change. We didn’t want to make the top of the opening arch level, because with the slope, it would actually be lower and probably awkward looking. The front part of the arch is the same height as the back part, so the trellis top slopes back. Because of the slope, the boards across the top of the arch are each a little further down the hill than the previous one and getting the 3' trellis cross-pieces to sit properly without taking the arches apart to plane down the tops was a challenge. Joseph’s solution was to use a 2 x 6 for the very front of the arch-top. The cross-pieces attach to that and the second one from the back. |
 |
This rose is Bibi Mazoon. I fell in love with it from a photograph in a catalogue which was somewhat deceptive—kind of like a dating service photo. This is a David Austin rose and one would THINK that English roses would do well in cool climates with a lot of moisture, but one would be wrong! This rose just sulked and whined for years in my old garden. It put out long, droopy canes with droopy roses that never fully opened and it was prone to mildew. Here, it has found a new lease on life. It is hard to see in this photo, but the flowers are positively peony-like. If I didn’t know this was the same rose, I would not have recognized it. That is holding true for many of my roses, which just shows you how much climate influences what they look like. |
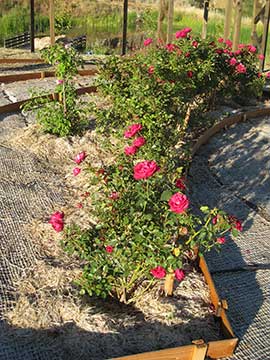 |
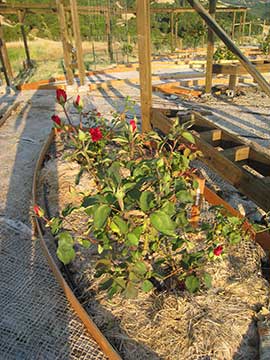
Here is a shot of my “hedge” made up of roses rescued from my local nursery. These are miniature roses that are sold in small pots with 4 or 5 plants in a pot. Once they are finished blooming, no one wants them. One day at my local nursery, they were throwing them out and pretty much forced me to take them when they saw I was willing to give them a home—much like someone with a litter of kittens. |
 |
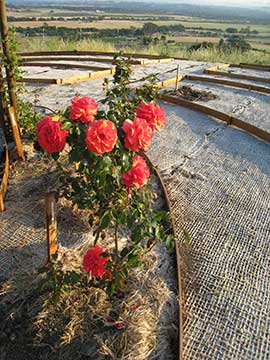
Here is a closer view of the hedge. These roses, which I had considered ripping out because they were so mildewy, are now looking quite wonderful. We have been having blasting heat and the roses are loving it. Even with the water crisis this last week, they seem to be doing fine. There is enough pressure down here because of the fall from the upper tank, that the sprinkler systems are working well distributing our meager amount of water.
|
 |
Susan Louise is the name of this rose. My brother gave me this rose and it has been a faithful grower for many years. It will probably get very large in this location. I have seen one which was about 8' tall and 6' across. It has really lovely flowers, but they don’t last long, so it is not good for arrangements unless you get the flowers as buds. |
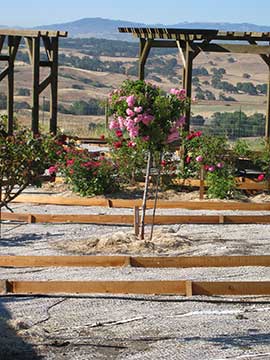 |
The China Doll standard is looking better each day, although it now is leaning a little. I realize that it will be a challenge to keep these roses straight with the heavy winds we have here. |
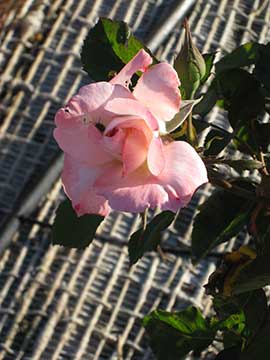 |
This rose is called Pristine. It is a hybrid tea and also looked quite different in its old home. This flower (with a lady bug crawling out of it) is an exotic, almost orchid-like pink. Previously, this rose was white with just a tinge of this pink around the petal edges. |
 |
Here is Royalty, which was all budded up last Friday, blooming now. |
 |
From down by the pond, you can faintly see the dome (with the naked eye, not in this photo.) |
 |
The bank by the road looks pretty parched and barren. I hope by next year we will have some xeriscape plants in here. I am planning some shrub roses, lavender, rock roses, rosemary and so forth. All of this will need to be on drip and will hopefully not need that much water. |
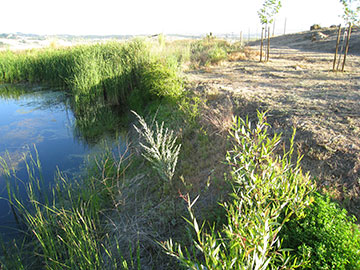 |
The pond is so low for this time of year. I hope it doesn’t dry out completely. We have a way to fill it from our water supply, but with the drought this year, I don’t think we would do it because we don’t know how much water we have available. As you can see here, there are a bunch of willow volunteers by the water. I am happy about that as long as they don’t grow on the dam. We need to keep anything with a large root structure from growing on the dam—for obvious reasons. We also have some of that obnoxious mini-papyrus, I notice. Whoever introduced that invasive pest into California ought to have a lifetime job going around removing it. |
 |
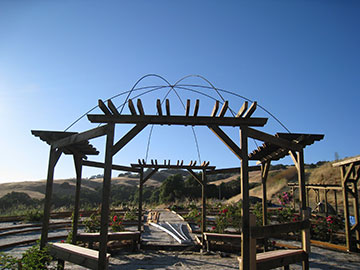
Here is the new dome again, shot from near the entrance of the arbor. I realize that there are too many pictures of it, but I am just so in love with it that I had to take them all and more. |
 |
This photo was actually taken on June 20th, but is the only garden photo that day, so doesn’t rate its own section. The big lumpy thing that looks like a rock in the rose bed, is actually an old straw bale. I am having my assistant move all the old straw bales used last winter for erosion control down here, to be recycled as mulch. Rotted straw is much better as mulch than new straw. It is all matted together, so stays in place against the wind much better. New straw is all individual stems and won’t stay put in the wind. The straw that I bought early this spring will be used next year to cover beds in our new landscaping around the house. |
| June 13, 2008 | |
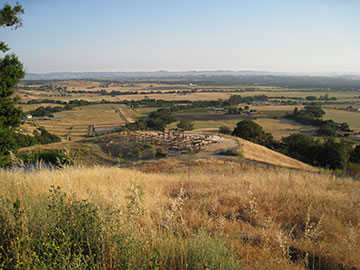 |
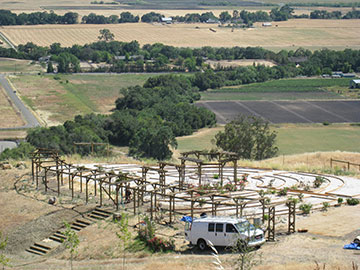
This shot is looking down on the garden from in front of the house. Usually, when taking pictures from this view I zoom in more, because it is hard to distinguish details in low resolution photos showing the real distance. However, I wanted to include this long view to show the dryness all over the area. Normally the grass is dry by this time of year, but not this dry—this is almost like August dry. |
 |
The sycamores are looking very dry and we
will have to up the amount of water they are getting. This is a little
iffy at the moment due to our current water crisis. When we arrived
at the property today, the water pressure in the cottage was very low.
I went out to look at the float on the tank and realized that it was
almost empty.
I called the well company and they determined that one of our wells is not hooked up to the electricity, which means that it is not pumping into the big tank. Whether it was never connected to the electricity or whether it was disconnected at some point is still unclear. Meanwhile, the water going into the big tank is all coming from our little spring well, which I am sure is putting out less water than usual due to the lack of spring rain. |
 |
Joseph has completed almost all of the changes on the arbor including some additional changes which we decided on last Wednesday. |
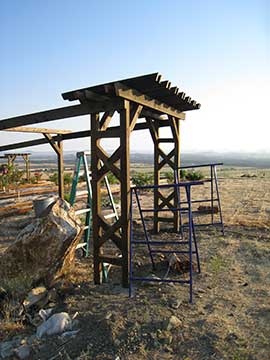 |
This is the entrance arch of the arbor. I wanted something a little grand to mark the opening so we have added an arch with side trellises and cross-pieces on top. Eventually, there will be a path leading from the road and another one leading from the garden that feed into this arch. |
 |
These two arches were formerly the “neck” from the main wing of the arbor. Because of the changing elevation, joining them to the main part of the arbor resulted in visual confusion. We detached them and made them each a separate unit. They delineate the path to the central circle and will support climbers as well. |
 |
One of the things Joseph will complete next week is the portico in the middle of the arbor. We decided to make the section of the arbor at the top of the stairs visually more important by making it taller and giving it a slat “roof.” We also added these two short trellises on the side leading toward the center circle which echo the opening arch. The top of this section will be taller than the rest of the main wing of the arbor because the upper supports are now 2 x 6’s rather than 2 x 4’s. Nailed across the top of the 2 x 6’s, will be pairs of 2 x 4’s, running parallel with the length of the arbor. As I observed other arbors to get ideas for our design, I realized that the tops of most of them consist of layers of perpendicular boards with the thickest ones on the bottom and the smaller ones toward the top. Some have only one or two layers, but the more elaborate ones sometimes have 5 or 6! You never pay attention to these things until you go to design one, and when you do look closely, it is always a revelation. |
 |
Here is another view of the short trellises and the 2 x 6’s on top of the central portal. |
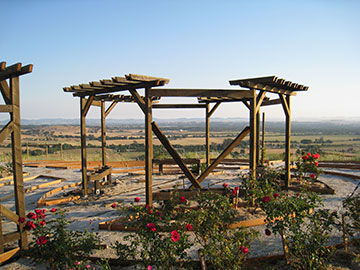 |
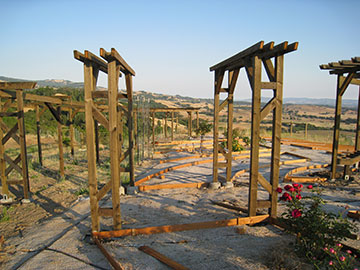
Meanwhile, the central circle got its fancy arch tops which really dress it up. These consist of spaced pairs of 3' long 2 x 4’s. We had thought about adding little trellises to these arches too, but decided it would be too heavy looking. Once the tops were on, though, the circle wasn’t as stable as Joseph wanted so we had to figure out an idea of how to brace it better. Joseph suggested that he build in little benches inside would also serve as braces for the circle. This was a brilliant idea because I had been pricing benches to put in the circle and worrying about whether they would fit, look good, take up too much room, cost too much, etc., etc., etc. It never occurred to me that we could just build them! |
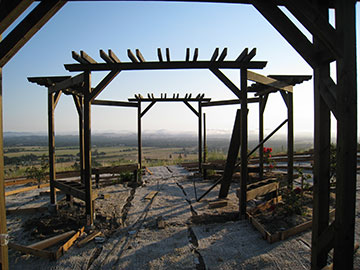 |
We added some more concrete for short posts to act as front legs and Joseph built frames for the bench seats. He has had some trouble finding decent redwood for the seats, so they are not complete yet, but the bench frameworks are shown here in this picture. (The wood leaning against the posts on the right is just temporary bracing and won’t stay.) One thing that occurred to me was that now that we have dressed up the arches with the cross-pieces, I am not sure how our re-bar dome is going to look. The plan had been to anchor a piece of re-bar at the top of each upright across the circle to an opposing upright to form a dome. We will have to experiment and see if it looks good or not. |
 |
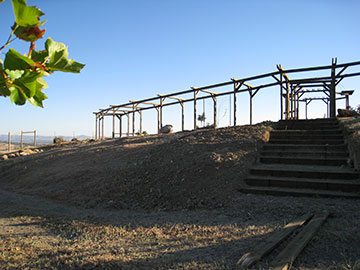
Here is a nice shot against the setting sun. I took this picture about 7:30 pm. It really shows how steep the slant of the hill is, and gives a better idea of what we have been up against with the perspective issue. It doesn’t show too well here, but the ground in the center of the circle has been leveled and there is a step at the upper and lower arch to enter the level area. |
 |
The center circle doesn’t show up that well against the landscape in this sunset photo, but I liked it because the bender board of the paths are reflecting the light. This path curves a little and we may have to do some adjustment on the bender board eventually to make it look more purposeful. On the other hand, look how weed-free it is! |
 |
Here are a few more of the roses. This one is called Royalty and is a hybrid tea rose. It is an old patented rose (with a tag). I assume the patent has lapsed because it is not listed in the Combined Rose List any more. (This is a book put out by some truly devoted rose people who list all the current roses in commerce.) After my grandfather—who was a notable gardener—died, I went to his house and dug up 2 roses as keepsakes. I gave one to my mother and kept this one. At the time, I took the two that looked the most robust, but how sorry I am that I did not bring them all. I had a small car and did not realize that I could bare-root them or wrap the root-balls in burlap. At any rate, this rose did not like it in my old garden much. It was a late addition, so it got one of the least sunny spots. I now know that red roses are most prone to mildew and need hot sun. All the red roses are loving the latest heat wave and this one is not an exception, being covered with buds. |
 |
This rose is called Fragrant Cloud because of its wonderful, intense fragrance. It is also a lovely, dark coral-colored rose, quite double. In my old garden, I never got enough of these flowers at one time to cut them, but maybe here it will be vigorous enough to produce some extras for the house. This rose, and indeed, all the red roses, have taken the longest to recover from the move. It is looking quite healthy now, though and I will be interested to see any changes to its habit now that it is in a better place. It has always been a rather compact bush, but maybe it will get bigger here. |
 |
As you can see, the bench is right behind Fragrant Cloud. The piece of board sitting on top of the closest one was so I could try out the height and make sure they were OK. This was actually a moot point, since the posts were already set in concrete, but I suppose Joseph could have lowered the seat frames if I had asked. Luckily, they were perfect. |
 |
This weeping rose standard is called China Doll. I bought it from the description because I wanted a weeping standard and did not know that it was a kind of icky pink. In the old garden it was terribly prone to mildew. Originally, I had it in a tub and it sulked terribly. One year I needed the tub for something else and planted it in the ground. After that, it did do better, but only looked good a few times a year. I was hesitant about moving it, but we needed to empty the space for the new installation, so it got moved. It seems much happier up here, and although it hasn’t grown out much from a more severe prune than normal, it is quite healthy and covered with flowers and buds. Weeping rose trees can be quite lovely but need to be kept in shape to look good. We pruned this one hard because of the move and I am sure it will look better as it grows out. |
 |
This is Gentile Giant again. Although you can’t see it well in this photo, the roses are a different color than they were earlier in the spring—much prettier with touches of orange. |
 |
Here is a picture of a couple of the Valley Oaks. The one closer to us is one that leafed out early and is doing well. The one in the background lost all its leaves but thankfully has put out new ones. I hope our heat wave of last week doesn’t do it in completely. |
| June 11, 2008 | |
 |
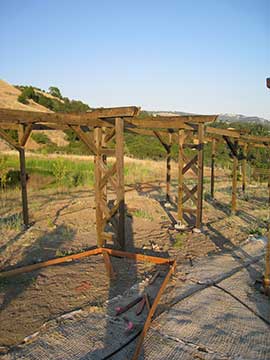
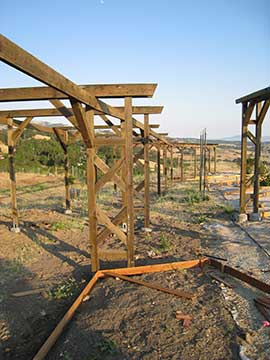
Joseph has been making progress on the changes to the arbor we decided on. There will be a much more impressive arch at the entrance by the road and the circle will get additions to make it more distinctive as well. I think it looks a lot better already. |
 |
I hope that some day, this garden will be an oasis of green here. We don’t have enough water to keep the property above the garden green throughout the dry season, but later on, we will either mow, weed-whack or goat it down. By that I mean, hire goats to eat the grass in the spring. |
 |
It is important to keep the brush down to control ticks and prevent fires. If there is no fuel going up the hill to the house, the fire danger drops to almost nothing. Around the house, we will have our defensible green zone. Fire moves the fastest up gullies, so the the gully running by the house toward the pond and the gully across the driveway with the oaks planted around it are of particular concern. |
 |
In this shot, you get a pretty good view of the braces on the entry arch for the arbor.This is something that Joseph had done on a trellis at his house and I think looks wonderful. He has put 4 x 4 spacers between the two posts on the diagonal, so they look like “X’s.” They are very handsome and will be wonderful for tying roses to. |
| Back to top | |