
| April 25, 2008—Visible progress at last! | ||
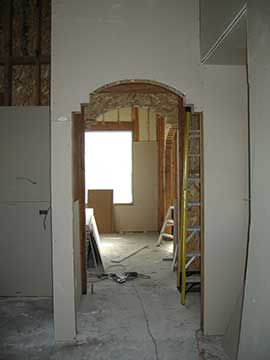 |
Here we are looking through the two arches from the kitchen to the dining room. I had noticed that there was an extra sheet of OSB nailed up to the wall in the alcove to the right of the arch, creating a 3/4" discrepancy between the plane of the alcove wall and the rest of the wall; however the drywall installers cleverly double boarded the rest of the wall and now you can’t tell there was a problem. |
|
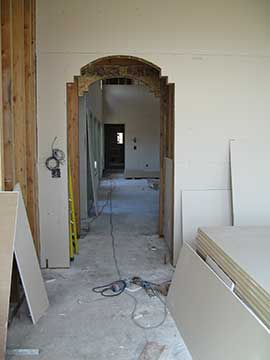 |
Looking back through those same arches from the dining room. Wait until the little hall between them is done and those arches will really look sharp. | |
 |
The great arch into the living room is still naked, but the stack of drywall in front of the fireplace is considerably lower. Watching the installers carefully cut the drywall is really amazing. They have it down to a science. Check out the leftover piece for one of the arches lying against the wall to see what I mean. They cut that double corner and just popped it apart. |
|
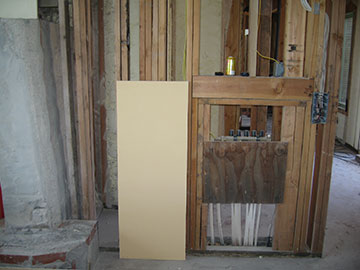 |
Here is the possible new paint color for the main rooms. Again, the combo of photo and web gives us only a vague approximation of the actual color. | |
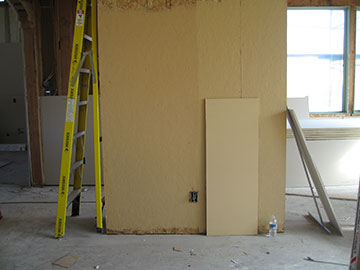 |
I had been considering the next color lighter on the fan-deck page from the color on the left side of the wall. When that proved to be too light, I mixed it with the two colors on the wall and came up with what I think will be the final color—seen here on the loose piece of drywall propped against the wall. It looks more buff or sand colored than in the photograph. I hope I will like it as much when I see it next week! |
|
 |
Our little ceiling coffer in the foyer got its drywall. The yellow thing—a sprinkler—will be exchanged for a little, ceiling-colored plate later and be much less obtrusive. | |
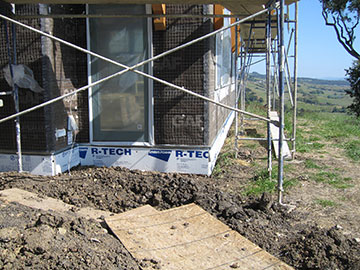 |
Outside, Kai’s helper was almost finished insulating the slab. The white stuff around the bottom of the structure is foam insulation for the slab. This will help keep it the temperature we want, rather than leaking heat in winter or sucking in the heat in summer. (There is also insulation between the slab and the ground beneath it.) This insulation will be finished with a skimcoat of plaster to match the walls. | |
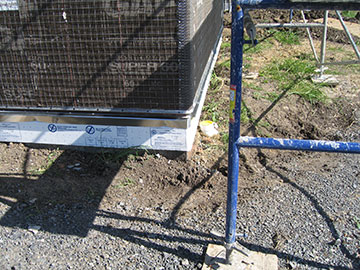 |
Here you can see the final outcome of the Great Weepscreed Wars. Todd Jersey, the architect, and I had wanted to have the stucco run seamlessly all the way into the ground. But neither Janver or the plaster contractor would warranty the work that way. When Janver explained to me why, I capitulated. There is a kind of ground fungus in the area, which can be brought in with fill, by birds or wind borne, which eats wood. His experience on a repair job where this fungus ate through framing and floor joists convinced him that this weepscreed arrangement is imperative for the safety of the building.
|
|
 |
Shown here, and in the photo above, are the two metal strips which separate the wall stucco and the slab insulation. The stucco will come down to the first strip—the weepscreed—and end there. The insulation, which starts at the lower strip, will be built out to match the depth of the stucco and then skimcoated with the final color. The metal strips and gap in between will be painted the same color as the plaster when all the other flashing gets painted, which will disguise it somewhat. A couple of times a year, the gap will need to be cleaned of any debris and inspected for termites or fungus. |
|
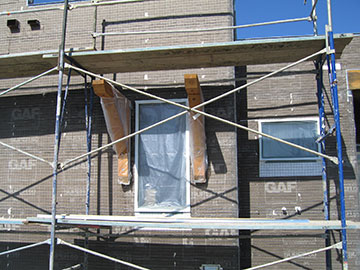 |
In preparation for stucco, they have started wrapping the brackets to keep the mud off. | |
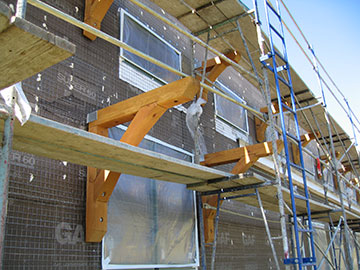 |
Here only the windows have been covered in preparation for stucco so far. | |
| For more on today’s progress, click here | ||
| Back to top | ||