
| August 6, 2008—Garlands and door knobs | ||
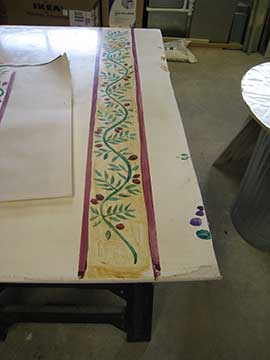 |
We were gone for the weekend to a work event for Jim and on the way home on Sunday, I stopped at the site to practice the garland I intend to paint on the range hood. The plaster contractor had left me 3 color samples and told me to practice on them. He had put wax on half of each sample so I could see how it looked and suggested I practice on both the raw plaster and waxed parts to see whether the paint went on better on one or the other. What I discovered is that it is easier to paint on the waxed side, but the paint comes off very easily. The contractor had said that we could wax again over the paint, but I am not sure that the paint would stay in place for the waxing process. |
|
 |
I have determined to paint on the raw surface, even though it is more difficult because the paint does not flow as smoothly off the brush. Also, there is no room for error, since once the paint hits the plaster it is absorbed. On this board, the left side is unwaxed and the right side is waxed. I did not finish the right side because I had already done a sample on the waxed surface of the board in the above picture. The yellow overlay looks very blotchy and bright in the photos but in real life, it looks much more mellow and tawny. |
|
 |
On Wednesday, I arrived at the site to find that the exterior doors had been fitted with door knobs. All the knobs are lever knobs. The exterior doors came with knobs and there were only a few styles to select from. We liked these the best, and really, they are quite attractive. | |
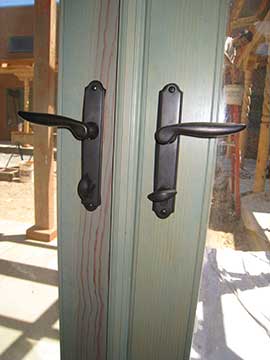 |
The knobs have been sitting in boxes since the doors were delivered way back last fall. There is a soft pad which sits behind the escutcheon—the plate behind the knob—and these are all crumpled from being squashed in the boxes all this time. They are so distorted from being crumpled that they are difficult to install properly. After they flatten out a bit, Kai will have to go back and unscrew the plates to reposition those pads on many of the doors . |
|
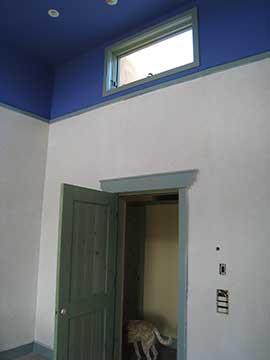 |
After a discussion with the painter, I agreed to have him bring the ceiling color in the master bedroom down to the picture rail. Everyone else likes it better, but I am not so sure . . . Well it’s a done deal now, so I guess it will stay. The bedroom looks unfinished to me, but maybe it’s because the tape is still up and the stencil is not done. I need to cut the stencil and get going on that. |
|
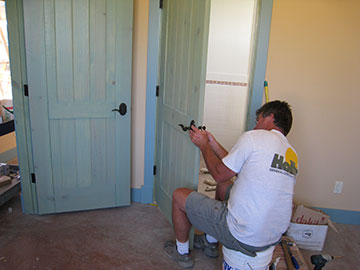 |
Kai was putting in the interior door knobs after finishing the exterior ones. These we picked out to coordinate with the exterior ones although they are not the same. We had a lot of angst over the knobs. I had seen a photo of a knob I liked and was all set to order it, but wanted to show it to Jim. We went to look at it in person and hated it. It was a cast bronze knob and we think they changed the cast slightly from the version shown in their older catalogue. I since have seen two sample knobs in this style—supposedly the same but looking very different. Since we weren’t exactly sure which version was current what we would end up with, we went with this style instead. |
|
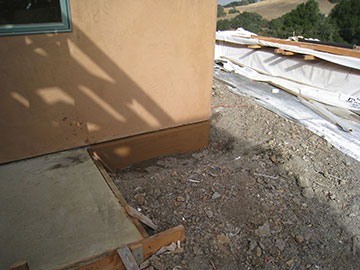 |
The plasterers were putting the final color coat on the slab insulation. What a relief to get that on. | |
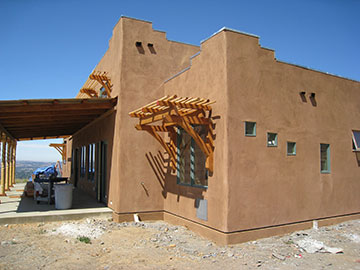 |
Also, one of the more elaborate shade brackets was complete—this one over the master bathroom window. As you can see from the shadow on the building, it does actually shade the window! There will be brackets like this over all the windows with the roll-down shutters in the kitchen, dining room, living room and guest bedroom. |
|
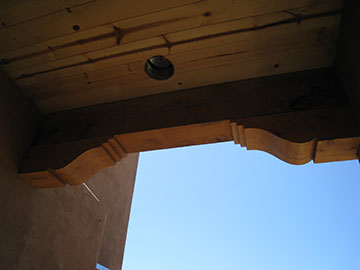 |
Kai had installed the corbels on the little beam by the chimney. This beam was stained with the darker stain before I saw it and said I wanted the pine stained with the lighter stain, so the corbels had to be stained to match. | |
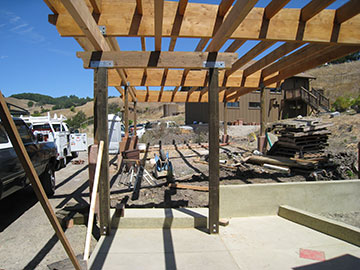 |
The framework for the carport walkway has been put up and is waiting for staining. We will finish the pressure-treated posts with stain the color of the house. | |
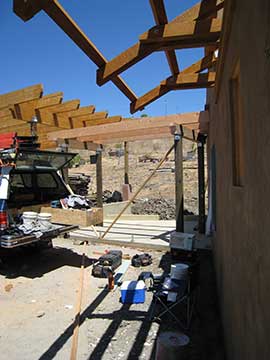 |
Here is a picture of the walkway framework taken from the front gate | |
| Click here to see more progress from August 6th | ||
| Back by popular demand—link to the Garden Page | Back to top | |